I'll admit it:
I didn't think this would work out — like, at all. Sure, my Moonstone
boasted a solid, healthy Lv. 100; however, his Move pool was nothing to brag
about, and certainly nothing to make the Hoenn Elite Four shiver in fear. Leech
Life was virtually useless at that point, and Aerial Ace was barely more useful;
this left me with Return and Shadow Ball as my best — and only, really — Elite
Four-conquering assets. Factor in the complete lack of Battle Items in my
inventory, and you'll understand why I harboured serious doubts about the very
viability of an immediate Elite Four showdown.
As a matter of fact, my doubts were so immense that I seriously pondered
backtracking in order to get Dig and Giga Drain. The former would be a giant
ace in the hole against Steven's Metagross; as for the latter, it would allow
me to heal while dealing damage. The (giant) problem was that I had no Fly
slave; and as far as I know, Hoenn Victory Road doesn't host 'Mons that can
learn Fly. Getting those two Moves thus required walking back the whole length
of Victory Road, and then walking and Surfing some more to reach Fallarbor and
Route 122 — with a stop at Lilycove to snatch some Battle Items. As you can
imagine, I was not exactly eager to tackle such a massive trip; and that's why
I decided to try as I was and hope for the best.
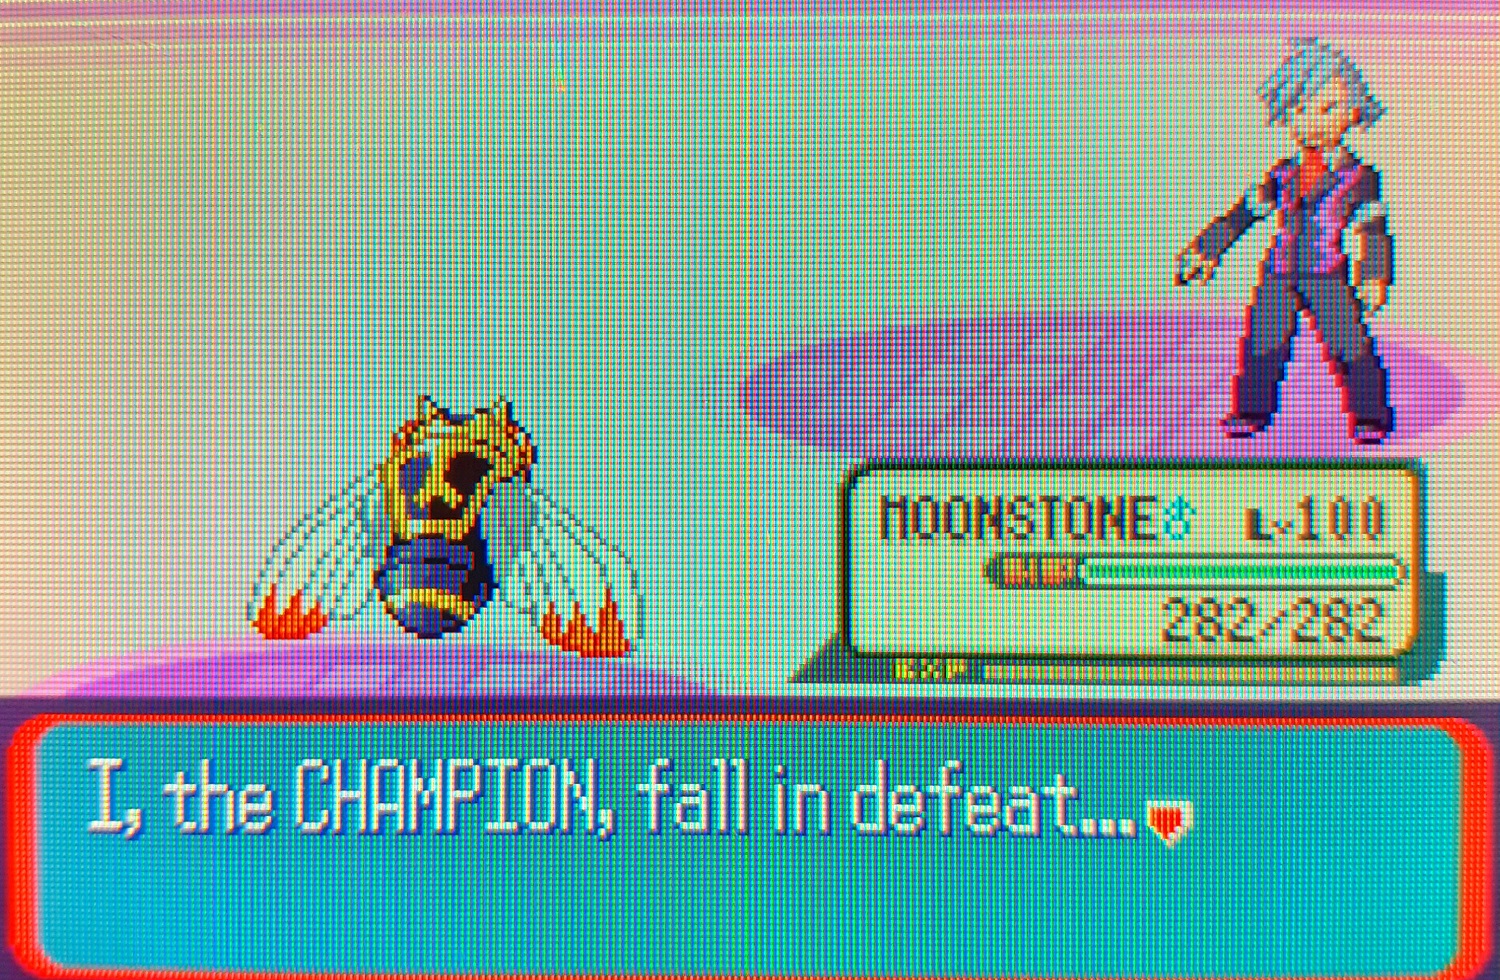
To my utter surprise, my Moonstone managed to one-shoot every single
Elite Four 'Mon bar Walrein and Salamence. This was an amazing start, and a
perfect beeline for Steven; said Steven, on the other hand, proved to be a tad
harder. Heck, more like a whole lot harder — yet not so hard that it became
unsurmountable, which made for an highly interesting final battle.

Steven opens with Skarmory, i.e. the most infuriatingly sturdy 'Mon this side
of Miltank — and a Flying 'Mon to boot, meaning super-effectiveness against my
Moonstone. It took a whopping eight Shadow Ball to clear the way,
because of Steven (obviously) using a Full Restore. Claydol went down quickly
with one neat Shadow Ball, after which I healed to be ready against Cradily. My
strategy involved letting Cradily use its five super-effective Ancient Power
while I healed every turn, after which I could safely pummel it into oblivion.
That worked out just fine, and Cradily went down with just two Aerial Ace —
meaning that I could have dispensed with emptying Ancient Power's PP; however,
I didn't know how much damage Aerial Ace would deal, and I didn't want to risk
fainting and having to restart the whole fight.
Armaldo could have posed a threat, wielding Ancient Power as well. I could have
used the same strategy as with Cradily; however, I decided to try my luck
instead. My reasoning was as follows: if Rock-Grass Cradily went down with two
Aerial Ace, then surely Rock-Bug Armaldo would do the same, Grass and Bug being
both weak against Flying. This reasoning was laughingly incomplete,
conveniently ignoring Armaldo's and Moonstone's stats; and indeed, Moonstone
came very close to fainting, but still managed to submit Armaldo.
Aggron and was a major pain in the arse, but not so much because of its stats
or Moves: it used mostly the deliciously inefficient Earthquake, and it didn't
resist Shadow Ball. No, it was a pain because Steven used three Full
Restores on it, effectively undoing my hard and patient sapping work in the
blink of an eye. I had to use a Max Elixir at that point, because I was running
out of PP for Return and Shadow Ball. Then came the dreaded Metagross; I
expected a tedious and arduous ultimate battle, and was left flabbergasted when
that most formidable foe went down with two swift, clean Shadow Ball. Well done, you!

Bug 'Mons usually make for wildly interesting Pokemon League battles, and
Ninjask was no exception. That Elite Four showdown hit just the sweet spot
between smooth and challenging, offering me a mighty fine mix of indecent
one-shooting and fine-tuned strategies. My King's Rock didn't trigger a single
time, which gives me added bragging rights: victory was attained solely with my
Moonstone's natural abilities — and not the most stellar Move pool to boot. And
now that I'm done with a challenging run for a change, how about another run
that's even more challenging? Like, a run in which you literally do or die?
Yup, that's right: a Shedinja Solo Run is next. Stay tuned for the upcoming run
report, fellow gamers — heck, I'm psyched now!
I've always
been a big Ninjask/Shedinja fan since Ruby's release back in 2003. Had one
Ninjask on my party for most of the game but by near end game it barely had
anything going for it, specially since I used TMs on other, more viable Pokémon
I had. The movepool for the Nincada line was really anemic, to say the least. I
also trained one on my Y playthrough and I had a lot more satisfying
experience, thanks to a very reliable combo of Swords Dance + X-Scissor.
Anyway, best of luck with the Shedinja run! Not doubting your vast experience
in soloing the games, but you'll probably need it. :p
Isleif27 October 2020 at 12:28
I'm really fond
of Ninjask and Shedinja, and it's delightful to be able to run with them at
long last. Man, Gen III really shone when it came to Bug 'Mons, with great
designs and adventurous concepts. Now, if the line got a revamped learnset in
Gen VI, I may want to tackle a Ninjask run again in ORAS.
Thanks for the kind words, my friend! I know I'll need every bit of luck I can
get if I want to pull off that run — along with a mighty dose of grinding and
strategizing. :P
No comments:
Post a Comment